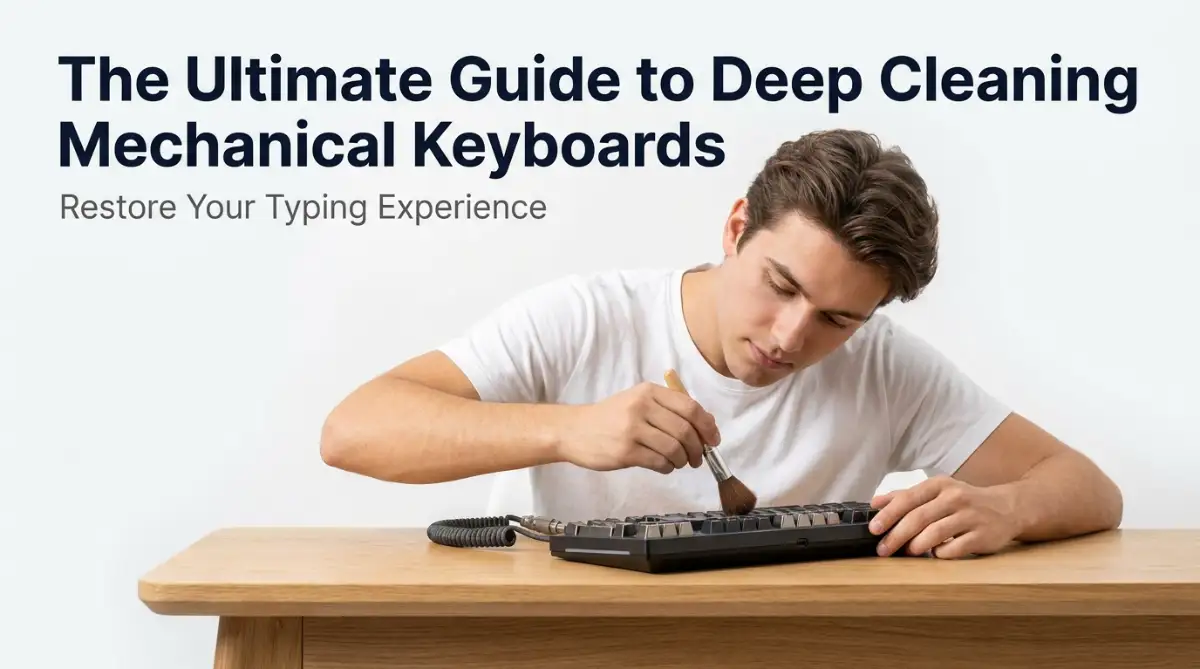
The Day My Favorite Keyboard Stopped Working
You sit down to type an email, hit the spacebar, and instead of a nice click, you get a gross, mushy thud. The key stays stuck for a second before slowly popping back up. I used to ignore the dust and crumbs falling between my keys until my expensive mechanical keyboard completely stopped working. Before you panic and buy a new one, let me show you how to safely clean that disgusting grime out of your board and make it type like a dream again.
Worse than that, the key stayed stuck down for a full second before slowly popping back up. My heart sank instantly. I rely on my computer for almost everything, and a broken keyboard is my biggest nightmare.
I turned the board upside down and gave it a gentle shake. What fell out was honestly horrifying. Crumb fragments, pet hair, and dust bunnies that looked like they belonged in a horror movie dropped onto my clean desk.
I felt a wave of embarrassment wash over me. I pride myself on keeping my workspace tidy, but I had completely ignored the one tool I touch every single day. My expensive, premium typing machine had turned into a literal garbage bin.
For the next few days, typing became an absolute chore. Every keystroke felt heavy, and my fingers felt dirty just resting on the plastic. I tried wiping the top with a damp cloth, but the sticky feeling underneath the keys did not go away.
I realized right then that a simple surface wipe was never going to fix this. My daily productivity was tanking just because I could not type comfortably.
We spend hours touching these keycaps, eating snacks over them, and letting natural skin oils build up on the plastic. Over time, this invisible layer of grime hardens, ruins the sound of your switches, and physically stops you from typing fast.
It is a terrible feeling when a gadget you love stops working correctly. You start worrying if you need to throw it away and spend hundreds of dollars on a replacement.
But I am here to tell you that your keyboard is not broken. It is just suffocating. You do not need a computer engineering degree to fix this mess.
All you need is a little bit of patience, a few basic household items, and a clear plan of action. Let us walk through the exact method I use to bring dead keyboards back to life without causing any water damage or broken parts.
The 30-Second Rescue Plan
- Unplug and picture: Never clean a plugged-in board, and always take a quick photo of your layout first.
- Use a proper puller: Ditch your fingers and use a wire keycap puller to avoid breaking the plastic stems.
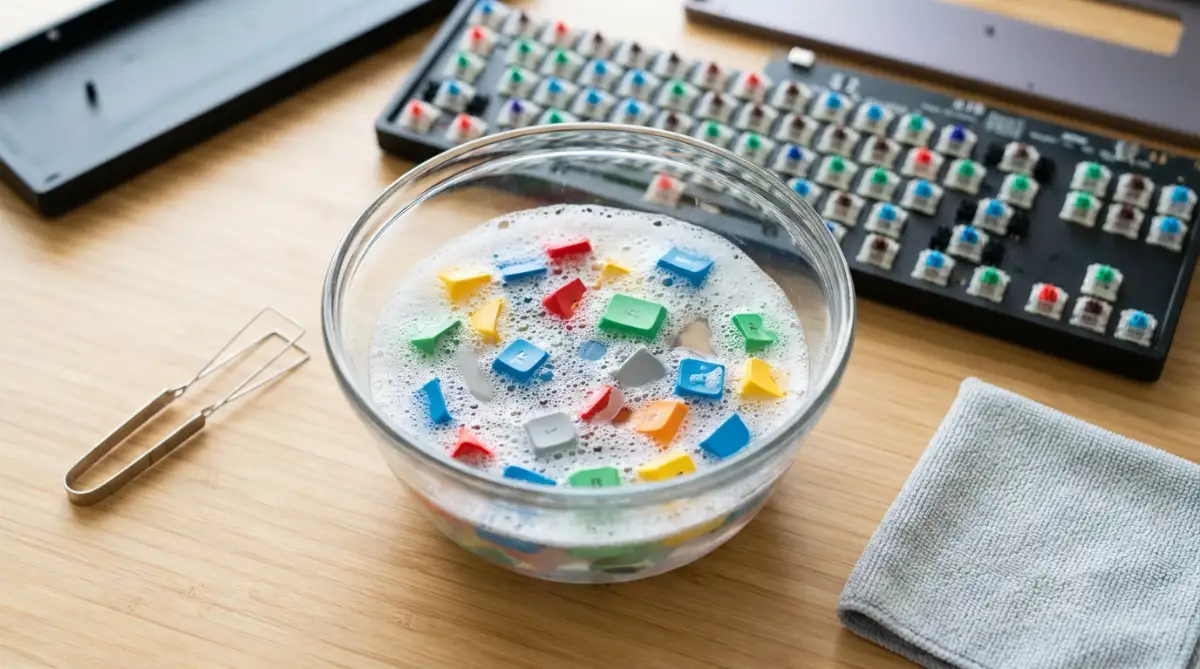
- Bubble bath for caps: Soak the plastic caps in warm soapy water, but keep the actual keyboard base totally dry.
- Alcohol for the plate: Use 99% isopropyl alcohol and cotton swabs to safely scrub the metal base between the switches.
Understanding the Hidden Threat Under Your Fingers
Before we grab our cleaning supplies, we need to understand what we are actually fighting against. Your mechanical keyboard is essentially a tiny, complex engine.
It has moving parts, metal springs, and sensitive electrical contacts. When you eat a sandwich at your desk, microscopic crumbs easily slip between the cracks of your keys.
Every time you press a button, you are pushing that dirt deeper into the switch housing.
Did You Know? The Switch Crusher
When a tiny crumb gets pushed down into a mechanical switch, it acts like sandpaper against the plastic slider inside. Over a few months, this constant scratching permanently ruins the smooth feeling of your keys. This is exactly why simply wiping the top of the keys is never enough!
Myth vs. Reality: Keyboard Cleaning
- The Myth: You can just blast the whole keyboard with canned air and it will be perfectly clean.
- The Reality: Canned air only blows loose dust around. It does absolutely nothing to remove sticky soda spills or hardened finger oils attached to the keycaps.
- The Myth: Putting your keyboard in the dishwasher is a great life hack.
- The Reality: Never do this! The extreme heat will melt your plastic keycaps, and the water will completely destroy the internal circuit board.
Skin cells, pet dander, and dust mix together inside the keyboard plate to form a thick, sticky webbing. This webbing wraps around your switches and makes them feel incredibly stiff.
If you live in a humid environment, this trapped dirt can actually hold moisture. That moisture eventually leads to rust on the metal plate or corrosion on the sensitive circuit board.
By deep cleaning your board, you are not just making it look pretty. You are actively extending the lifespan of your electronics and protecting your investment.
Preparing Your Workspace for the Rescue Mission
You cannot rush a proper deep clean. If you try to hurry through this process, you will easily lose small pieces or snap a delicate plastic stem.
Clear off a large section of your desk. You will need plenty of flat, well-lit space to organize your keycaps so they do not roll onto the floor.
Grab two small bowls from your kitchen. You will also need a microfiber cloth, a wire keycap puller, some cotton swabs (Q-tips), and a bottle of high-percentage isopropyl alcohol.
I usually recommend grabbing a soft-bristled toothbrush or a clean makeup brush as well. These soft brushes are amazing at sweeping away loose dust without scratching your expensive aluminum case.
Pro Tip: I used to pull my keycaps off using my bare fingers, thinking it was faster. I ended up snapping the stem off my favorite 'Enter' key and had to buy a whole new set of caps. Always use a proper wire keycap puller—it protects the plastic and saves you a massive headache later.
Step 1: Documenting Your Layout and Disconnecting
The very first thing you must do is completely unplug your keyboard from your computer. If it is a wireless model, turn the power switch off and remove the batteries if possible.
You never want active electricity flowing through a device while you are pushing brushes and liquids around it. A simple static shock can easily short out a highly sensitive circuit board.
Once the board is completely dead and safe, grab your smartphone. Take two or three very clear pictures of your keyboard from straight above.
Make sure you can easily read the letters on the picture. You might think you have the standard QWERTY layout memorized perfectly in your head.
But trust me, when you have a pile of eighty different plastic squares sitting on a towel, you will absolutely forget where the 'Page Down' or 'Insert' keys go. Those reference photos will save you hours of frustrated guessing.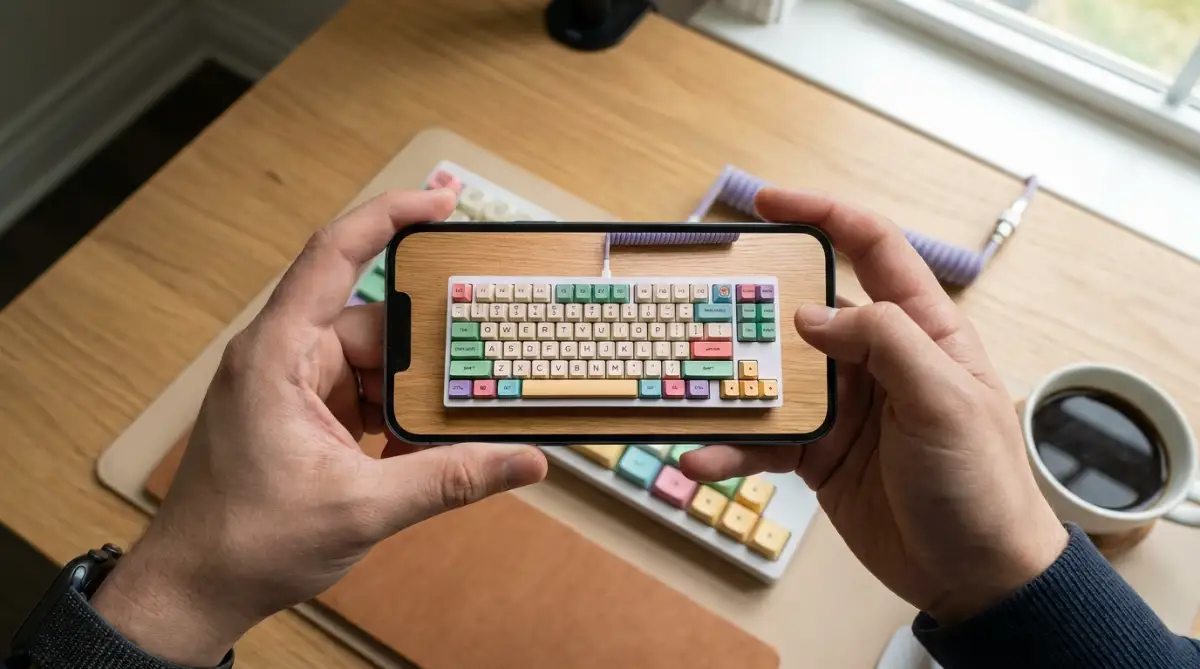
Step 2: Removing the Keycaps the Safe Way
Now comes the most satisfying part of the entire process. Take your wire keycap puller and gently slide the two metal wires over the sides of a keycap.
Twist the puller slightly so the wires catch the bottom corners of the plastic. Pull straight up with a firm, even motion.
Watch Exactly How to Pull Keycaps Without Breaking Them:
Taking off keycaps seems easy until you encounter a stubborn switch that refuses to let go. This quick visual guide shows the exact angle you should use to safely pull your caps without damaging the delicate mechanical stems underneath.
The cap should pop off easily. Never pull at an aggressive angle, or you risk breaking the cross-shaped stem sitting underneath.
When you get to the larger keys like the Spacebar, Shift, and Enter keys, you need to be extra careful. These keys have special metal wires underneath them called stabilizers.
Pull up very slowly on one side, then the other. Gently unhook the plastic from the metal wire before pulling the key completely away.
As you remove the keycaps, drop them all into your first empty kitchen bowl. Looking at your bare keyboard right now might shock you.
Without the caps hiding the truth, you will finally see the absolute mountain of hair, dust, and crumbs trapped on the metal plate. Do not panic; we are going to make it look brand new very soon.
Step 3: Giving Your Keycaps a Proper Bubble Bath
Your keycaps take the most physical abuse out of any computer part. They absorb the natural oils from your fingertips every single day.
Take your bowl full of keycaps and carry it to the sink. Fill the bowl with warm water.
Do not use boiling hot water. Extremely hot water can easily warp thin plastic, completely ruining the shape of your keys.
Add two drops of regular liquid dish soap to the warm water. Dish soap is designed specifically to cut through heavy grease, making it the absolute best tool for melting away finger oils.
Swirl the water around with your hand until you see nice, soapy bubbles. Let the keycaps soak in this bath for about twenty to thirty minutes.
While they soak, the soapy water will naturally lift the stubborn grime off the plastic walls. After the timer goes off, give them one final swirl with your fingers.
Drain the dirty water into the sink. You will probably notice the water looks a bit cloudy, which just proves how much dirt was actually hiding on your board.
Rinse the caps thoroughly under cold tap water to remove any leftover soap bubbles. Lay a clean, dry towel out on your desk and dump the wet keycaps onto it.
Spread them out in a single layer. Leave them alone to air dry completely.
Never put wet keycaps back onto your keyboard. Even a tiny drop of trapped water can drip down into the mechanical switch and cause immediate rust.
Step 4: Sweeping Out the Dry Debris
While your freshly washed keycaps are drying on the towel, we can focus on the actual keyboard base. Turn the board completely upside down over a trash can.
Give the back of the case a few firm, solid taps with your hand. You will instantly see a shower of loose crumbs and heavy dust fall out into the trash.
Turn it right side up and grab your soft-bristled brush. Carefully sweep the brush between the rows of exposed mechanical switches.
Sweep all the loose dirt toward one specific edge of the board. I like to keep a small handheld vacuum running right next to the edge to suck up the dust as I sweep it out.
If you do not have a small vacuum, just sweep the dirt off the edge of the desk and clean it up later. Make sure you brush gently around the delicate metal stabilizer bars.
Expert Warning: The Stabilizer Trap
Those metal bars sitting under your spacebar and shift keys are covered in a special thick grease from the factory to stop them from rattling. If you aggressively brush these wires or wipe them with alcohol, you will strip that grease away, and your spacebar will sound incredibly loud and hollow afterward. Be very gentle around them!
You do not want to accidentally pop a metal bar out of its housing. Take your time and focus on the tight corners where dust loves to hide.
Step 5: Scrubbing the Stubborn Grime
Sweeping only removes the loose, dry dirt. You will likely still see sticky spots, dried coffee drops, or strange smudges on the metal plate between the switches.
This is where your isopropyl alcohol and cotton swabs come in to save the day.
The Safe Cleaning Liquids Comparison
Dip one end of a cotton swab lightly into the isopropyl alcohol. You want it to be damp, not dripping wet.
Carefully scrub the tight spaces between the switches. The alcohol will instantly dissolve the sticky residue left behind by old soda spills.
Because alcohol evaporates in seconds, you do not have to worry about liquid seeping down into the sensitive circuit board. If the cotton swab gets dirty and brown, throw it away and grab a fresh one.
Wipe down the outer edges of the plastic or aluminum case as well. Watching the original shiny color of the metal plate come back to life is incredibly satisfying.
Your bare keyboard base should now look completely spotless. The sticky grime is gone, the dust bunnies are in the trash, and the metal plate is shining.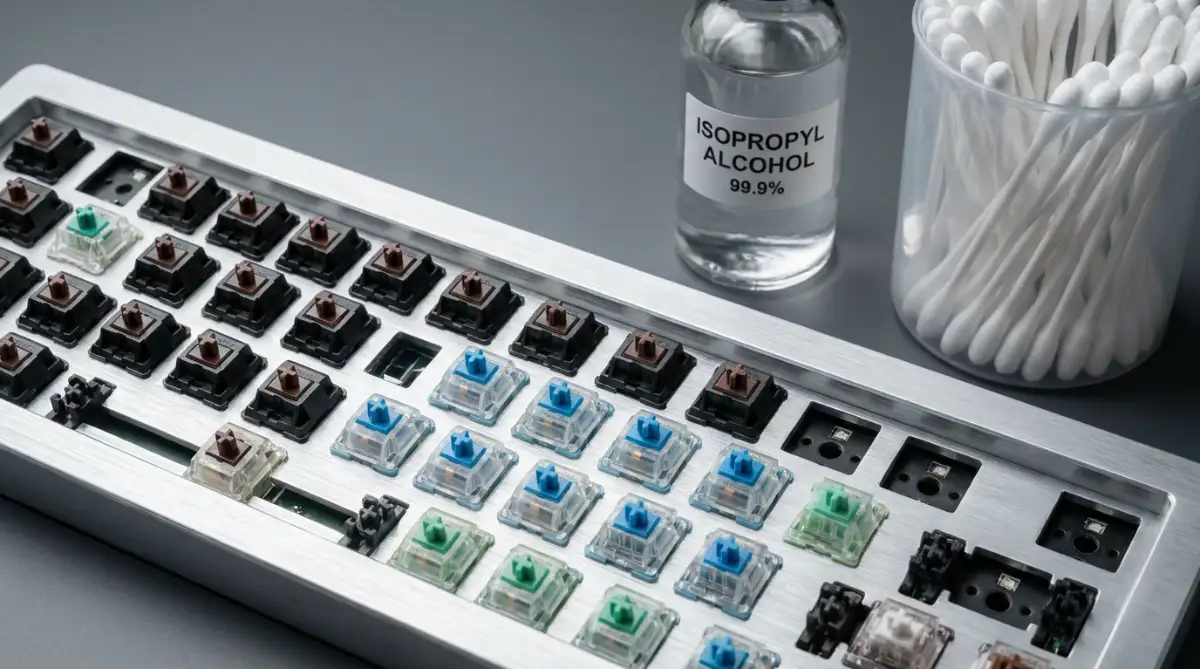
Now, we just have to wait for those keycaps to dry completely before we put the puzzle back together.
Advanced Maintenance: Keeping Your Typing Experience Crisp
So, you have successfully washed your keycaps and scrubbed the metal plate. Your keyboard is currently sitting on your desk, looking significantly cleaner than it did an hour ago.
But cleaning your keyboard is only half the battle. If you want that crisp, snappy feeling to last for years, you need to understand how to actually maintain the hardware.
When you put your keycaps back onto the dry stems, press them down firmly until you feel a solid physical click. Do not smash them with your fist.
If a keycap feels wobbly after you install it, you likely did not align the plastic cross properly with the mechanical stem underneath. Take it off and try again gently.
The Weekly Quick Dust Strategy
You do not need to pull off eighty plastic caps every single week. That is a massive waste of time and puts unnecessary stress on the plastic stems.
Instead, build a thirty-second dusting habit into your weekly routine. Keep a clean, dry makeup brush in your desk drawer.
Every Friday afternoon, before you shut down your computer for the weekend, quickly run that soft brush over the top of your keys. This prevents the initial layer of loose dust from settling deep into the keyboard base.
Honestly, learning how cleaning your desk instantly reduces anxiety and boosts focus completely changed how I work. Keeping that brush nearby just makes my entire workspace feel so much more professional.
Managing Keyboard Lubrication (For Enthusiasts)
If you have a hot-swappable mechanical keyboard, you might eventually notice a scratchy sound when you press certain keys. This usually happens when the factory lubrication inside the actual switch starts to dry out.
If you are feeling brave, you can purchase a small tube of specialized keyboard lubricant, like Krytox 205g0. You take the switch apart and lightly paint the inside plastic rails with a tiny brush.
This is a highly advanced step and totally optional for casual users. If you want a deep dive into the engineering behind mechanical switches and friction, the experts at Tom's Hardware offer an incredible breakdown of switch mechanics and maintenance.
For the average person, just keeping the top plate clean will solve ninety percent of your typing problems.

The Nightmare Mistakes That Destroy Keyboards
I have seen people completely ruin a two-hundred-dollar mechanical keyboard simply because they tried to take a lazy shortcut. When you get impatient, electronics always suffer.
Let us look at the most dangerous mistakes you must avoid during the cleaning process. These are the physical traps that turn a simple Saturday project into a highly expensive disaster.
The Canned Air Condensation Trap
Canned air seems like the perfect tool for cleaning electronics, but it comes with a hidden physical danger. When you hold a can of compressed air upside down or spray it for too long, the can gets freezing cold.
If you spray that freezing gas directly onto a warm metal keyboard plate, it instantly creates physical condensation. You are essentially spraying tiny droplets of liquid water directly onto an exposed circuit board.
If you must use canned air, always hold the can perfectly upright. Spray in quick, one-second bursts to prevent the can from freezing over.
Forcing Stuck Keycaps
We talked about using a proper wire puller earlier, but I need to stress exactly why this is so important. Some keycaps, especially on gaming keyboards, fit incredibly tightly onto the switch stem.
If you pull at an awkward angle, or if you use a cheap plastic ring puller, you will literally rip the internal switch housing right out of the metal plate. If your keyboard is not hot-swappable, you just broke the soldering joint on the motherboard.
If a cap feels absolutely stuck, wiggle the wire puller gently side to side while pulling upward. Never force it with brute strength.
The Danger of Heavy Chemical Cleaners
I cannot tell you how many times I have seen someone spray heavy bathroom cleaner or Clorox wipes directly onto their keyboard. These harsh chemicals are designed to kill bacteria on kitchen counters, not to clean delicate ABS or PBT plastic.
Harsh bleaches will physically melt the top layer of your keycaps, leaving them feeling permanently sticky and looking extremely cloudy. Stick to simple dish soap for the plastic parts and high-percentage isopropyl alcohol for the metal plate.
If you want to understand why certain chemicals destroy plastics, the National Institute of Standards and Technology provides excellent guidelines on material degradation when exposed to common household cleaners.
Treat your expensive technology with the same respect you give to your smartphone screen. You would never spray bleach on your phone, so do not do it to your typing equipment.
Your Action Plan for a Spotless Desk
We have covered a lot of physical ground today. You now understand exactly why your keys were sticking and how to safely remove the disgusting grime trapped underneath them.
You no longer need to feel embarrassed when a friend sits down at your computer. You also do not need to spend money replacing hardware that just needed a little bit of physical love.
The Weekend Cleaning Checklist
You do not have to memorize every single step. Just bookmark this page and keep these core rules in mind the next time your spacebar starts acting up:
- Always unplug the physical cable before doing any deep cleaning.
- Take a picture of your layout before pulling a single keycap off.
- Use warm soapy water for the plastic caps, never boiling hot water.
- Let the keycaps air dry completely—a single drop of water can cause rust.
- Keep a soft makeup brush nearby for quick weekly dust sweeps.
Taking care of your physical workspace translates directly into taking better care of your digital workspace. It is a natural progression of organization.
When your keyboard feels crisp and clean, you naturally want to type faster and get more work done.
I honestly felt a huge weight lift off my shoulders the first time I fully cleaned my mechanical board. Typing actually felt fun again, and I stopped getting so frustrated during long work hours. Grab your wire puller, put on a good podcast, and give your favorite keyboard the deep clean it absolutely deserves today!
Common Questions About Keyboard Maintenance
How often should I actually deep clean my mechanical keyboard?
If you use your computer every single day, aim for a full deep clean every four to six months. If you constantly eat snacks directly over your keyboard, you might need to do it every three months to prevent sticky switch mechanisms.
Can I just put my plastic keycaps in the dishwasher?
Absolutely not. The extreme heat of a standard dishwasher cycle will easily warp the plastic and completely melt the tiny stems underneath. Always wash them gently by hand in a bowl of warm, soapy water.
What do I do if a specific key still feels sticky after cleaning?
If the switch still feels terrible after cleaning the metal plate, the actual mechanical housing might be damaged. If you have a hot-swappable keyboard, simply buy a new replacement switch for a few dollars and click it into place.
Is it safe to use a hair dryer to dry my wet keycaps faster?
You should definitely avoid using a hot hair dryer, as the concentrated heat can easily melt thin plastic keycaps. If you are in a massive rush, use the "cool air" setting on the dryer, or just wipe them carefully with a dry microfiber cloth.
Disclaimer: The information provided in this guide is for educational and informational purposes only. Keyboard builds, switch types, and manufacturer warranties vary greatly. Opening your keyboard case or removing switches may void your official warranty. Always consult your specific manufacturer's manual before attempting deep cleaning, and proceed with caution when handling electronic components.