My Long Walk Toward Finding Realistic Design Assets
You are working on a massive 3D project, and you desperately need a realistic wood texture. You spend two hours scrolling through expensive stock photo sites, only to download an image that looks like cheap plastic wrapped around your model. I used to lose sleep over my designs looking fake, wondering how top-tier professionals created those jaw-dropping, ultra-realistic surfaces. The secret? They are not buying stock photos anymore; they are generating them. Let me show you exactly how I use free, open-source AI tools to create mind-blowing photorealistic textures in seconds, keeping my clients thrilled and my budget untouched.
My head hurt from the stress, and I felt like I was failing as a designer. I had all these expensive tools, but I still couldn't make a simple piece of wood look natural. It felt like pro designers had a secret they weren't telling me.
I tried taking photos of real wood with my phone, but the shadows were all wrong. My work looked "plastic," and I was scared I would lose my client. Then I decided to try something different with open-source AI.
It took me a few days of making mistakes, but I finally saw a glimmer of hope. I typed in a few words, and a high-quality, rough-edged stone texture appeared on my screen. I couldn't believe it was free and that I made it in seconds.
Since that day, I never look for stock textures again. My workflow is faster, my clients are happy, and I finally feel like I have control over my art. I want to show you exactly how I did it so you can avoid the pain I went through.
The Mental Load of Bad Graphic Assets
When you are a designer, your work is your pride. But when you can’t get the details right, it hits your confidence hard. You look at your screen and feel like a hobbyist rather than a professional.
Spending hours searching through messy websites for a single texture is a drain on your mental health. It takes away the time you should be using for creative thinking. Instead, you become a digital janitor, cleaning up low-quality images.
This stress isn't just about the work; it affects your peace of mind at home. You can't enjoy your free time because you are thinking about that one flat-looking object in your design. It makes the whole process feel like a chore instead of a passion.
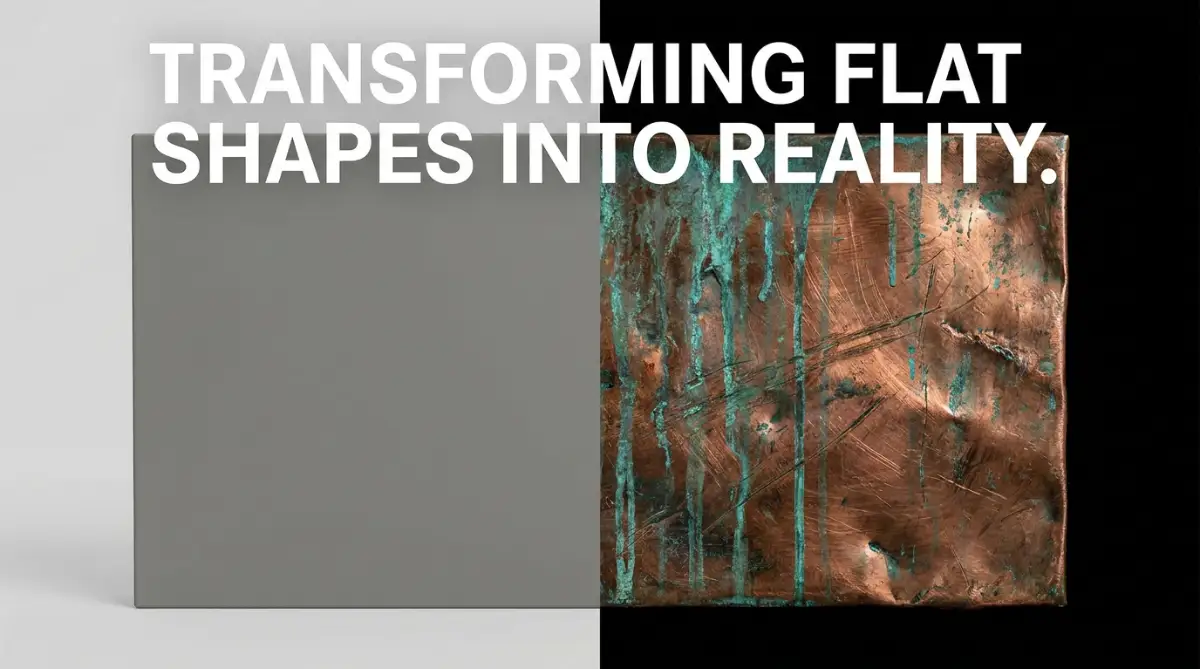
The "Zero-Cost" Pro Texture Blueprint
- Stop Paying for Stock: Use Stable Diffusion to create unique, high-res textures that no one else has.
- Prompt Like a Pro: Don't just say "wood." Describe the age, lighting, and small flaws (like deep cracks or moss) to get real results.
- The Tiling Rule: Always turn on the "seamless" or "tiling" option so your textures don't have ugly lines when you repeat them.
- Upscale Everything: Use AI upscalers to turn basic 512px images into 4k masterpieces for professional-grade sharpness.
Your Quick Guide to AI Texture Mastery
- Ditch the Stock Sites: Stop paying $15 for a single blurry photo. Open-source AI like Stable Diffusion lets you create unlimited, unique textures for free.
- Prompt the Imperfections: Real life is messy. Always include words like "dust," "scratches," or "moss" in your prompts to kill the fake, plastic look.
- Always Tile Your Work: Never forget to check the "Seamless" or "Tiling" box before generating. This prevents ugly, visible seams when wrapping a 3D model.
- Upscale for Sharpness: A blurry 512px image will ruin your design. Always use a free AI upscaler to bump your textures up to a crisp 4K resolution.
Choosing the Right Tools Without Breaking the Bank
The first thing you need to know is that you don’t need to spend thousands on software. There are free, open-source tools that can do amazing things if you know how to use them. I personally like using tools like Stable Diffusion because it gives me total freedom.
You can run these tools on your own computer or even in a free cloud setup. They allow you to be the boss of your creative process. No more paying for every single download from a stock site.
Using open-source software means you can tweak the settings to get exactly what you need. It might feel a bit scary at first, but it is just like learning any other design tool. Once you get the hang of it, you will never want to go back.
Talking to the Machine: The Logic of Prompts
Prompting is just a fancy word for talking to the AI. But you have to speak its language to get photorealistic textures. If you just type "wood," you will get a very boring result.
You need to describe the texture like you are seeing it in real life. Think about the age of the material, the lighting, and the small imperfections. Instead of "wood," try "macro photo of old, weathered oak wood with deep cracks and moss."
The more detail you give, the more the AI understands the physical world. I found that adding words like "8k resolution" or "highly detailed" helps a lot. It tells the tool to focus on the tiny things that make a texture look real.
My Personal "Photorealistic Prompt" Formula:
Whenever I need a texture, I always build my prompt using this exact structure:
- Subject: Macro photography of rusty iron...
- Imperfections: ...with heavy oxidation, chipped green paint, and deep scratches...
- Lighting: ...illuminated by harsh directional studio lighting...
- Technical Tags: ...8k resolution, seamless tile, PBR material, hyper-detailed.
Pro Tip: One big mistake I made early on was being too vague. I realized that if I describe the lighting in my prompt, the texture blends perfectly into my graphic designs. For example, telling the AI the light is "soft morning sunlight" makes the surface look much more natural.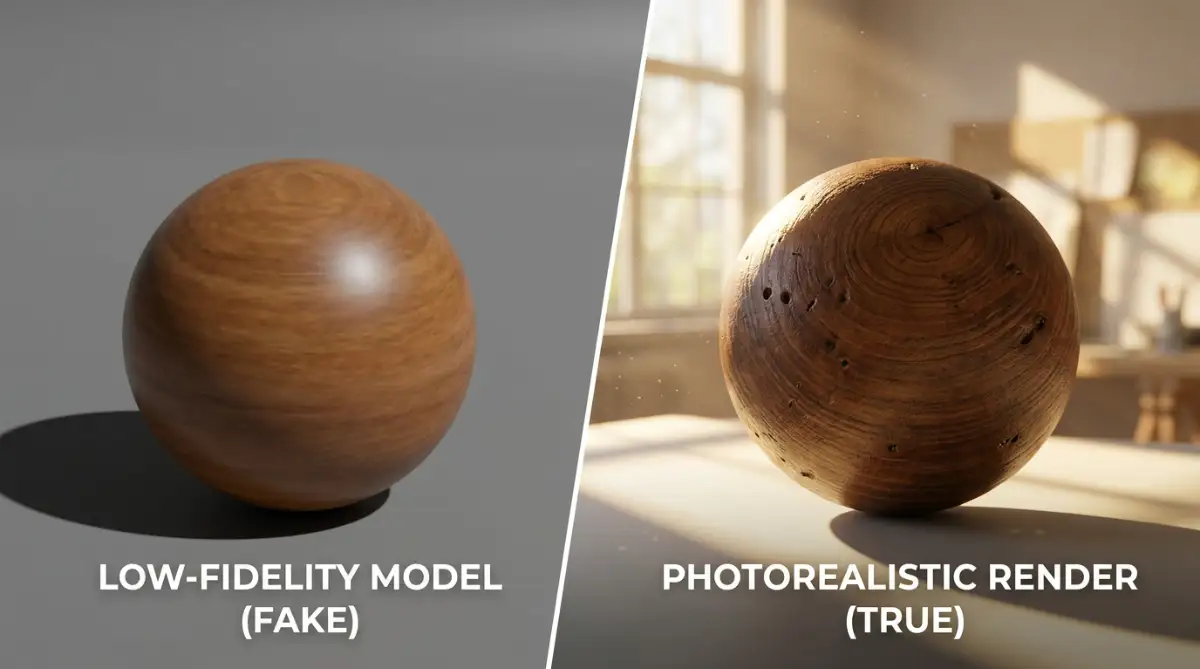
My Personal "Cheat Code" for Photorealism:
If your textures still look a bit fake, try adding these three words to your prompt: "subsurface scattering," "micro-displacements," and "anisotropic highlights." Most beginners ignore these, but they are what tell the AI to handle light passing through surfaces like skin, marble, or fabric. I’ve found that these three phrases alone cut my editing time in half because the raw output looks so much more professional.
The Science of Light and Surface Details
To make a texture look "pro," you have to understand how light hits a surface. This is what we call PBR logic in the design world. It’s about how rough or shiny a surface is in real life.
When you generate a texture, think about how it should reflect light. A rusty metal sheet should not be as shiny as a new car. You can ask the AI to add "matte finish" or "high gloss" to change this.
Imperfections are your best friends here. In the real world, nothing is perfectly clean. Adding words like "dust," "scratches," or "fingerprints" to your AI prompt makes the texture feel human and real.
Watch this video to see the live process of generating textures from scratch!
Building a Seamless Flow for Your Projects
If you are a graphic designer, you know that textures need to be "seamless" or "tileable." This means you can place them side by side without seeing a big line in the middle. Most open-source AI tools have a special setting for this.
I always make sure to turn on the "tiling" option in my software. This allows me to use a small texture image on a huge 3D model or a large background without any issues. It saves so much time in the long run.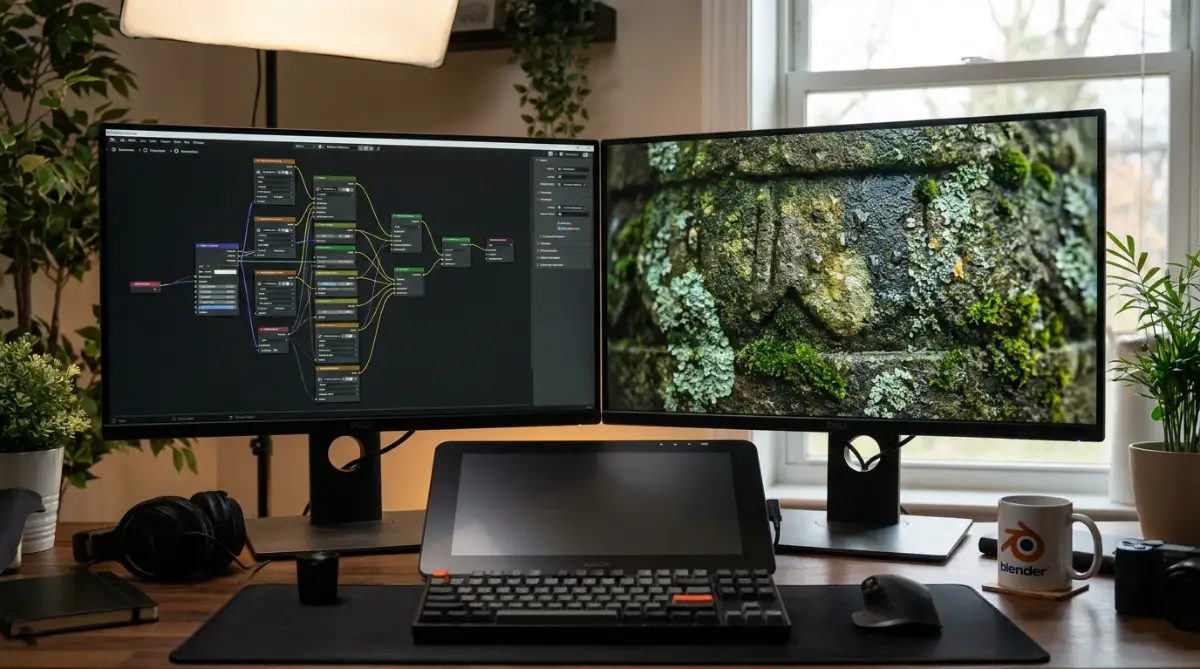
If you forget this step, you will spend hours in your photo editor trying to fix the edges. Do it right the first time inside the AI tool. It makes your textures look like they were made by a high-end studio.
Managing Texture Resolution for Pro Quality
One thing I learned the hard way is that resolution matters. If your texture is blurry, your whole design will look cheap. Most open-source tools let you generate images at a good size, but you can also "upscale" them.
Upscaling means taking a small image and making it bigger without losing detail. I use free AI upscalers to turn my 512px textures into 4k or 8k masterpieces. It makes the wood grain or stone cracks look incredibly sharp.
Always check your texture at 100% zoom. If you see blur, you need to upscale it. A sharp texture is the difference between a project that looks okay and one that looks world-class.
Creating Textures for Different Materials
Each material has its own set of rules. For example, metal needs to look heavy and have a specific kind of shine. When I prompt for metal, I use words like "brushed steel" or "industrial iron."
Fabric is different because it needs to look soft. I use words like "high thread count," "woven texture," or "soft shadows" for fabric. This tells the AI to create a surface that looks like it has a "feel" to it.
Stone and brick need to show depth. I often add "heavy shadows" or "rugged surface" to my prompts for these materials. It helps create a sense of weight in my graphic design work.
The Importance of Color Theory in Textures
You should also think about the colors of your textures. If your whole design is warm and cozy, a cold blue metal texture will look out of place. You can tell the AI exactly what colors to use.
I often add color descriptions like "warm golden oak" or "deep charcoal grey stone." This ensures the texture fits the mood of my project. It’s much easier to do this in the AI tool than trying to change the colors later.
Color helps tell a story. A bright red brick texture feels different than a pale, sandy brick. Use color to help your audience feel the emotion of your design.
Storing and Organizing Your AI Texture Library
Once you start generating these, you will have hundreds of files. I made the mistake of not naming my files properly, and I lost a lot of good textures. Now, I have a system that keeps me organized.
I name my files by the material and the mood, like "Oak_Old_Weathered_01." This allows me to find what I need in seconds. I also keep them in folders based on the material type.
A good library is a huge asset for your career. Over time, you will have a collection of textures that no one else has. This makes your work unique and helps you stand out in the crowded design market.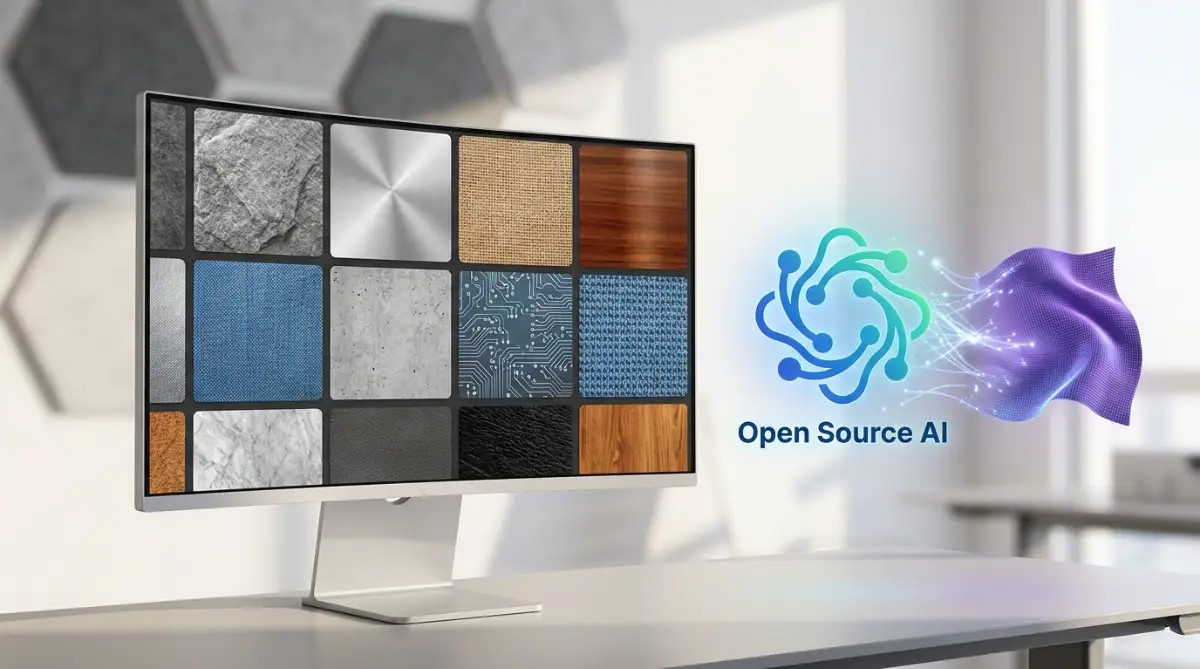
Ethical Use of Open-Source Tools
Using open-source tools is a great way to stay ethical in your work. Since you are running the tools yourself, you have more control over the data. I always make sure to use models that are safe and open for creative use.
This gives me peace of mind when I am working for big clients. I know that my tools are legal and that I am following the best practices of the design community. It builds trust with the people who hire me.
Always stay updated on the latest news in the open-source world. Things move fast, and there are always new and better models coming out. Being the first to use a new tool can give you a big head start.
Refining Your Textures with Post-Processing
Sometimes the AI gets it 90% right, but it needs a little help. I often bring my generated textures into a simple photo editor to tweak the contrast. This makes the dark areas darker and the light areas pop more.
You don't need fancy skills for this. Just a few clicks can make a big difference. I also like to sharpen the edges a bit more to give it that "extra" realistic look.
Post-processing is the final touch that makes your work look like it came from a professional studio. Don't be afraid to spend five minutes fine-tuning your AI results. It is the secret of many top designers.
Pro-Tip: The "High Pass" Photoshop Trick
If your AI texture looks a little flat, open it in Photoshop. Duplicate the layer, go to Filter > Other > High Pass, set it to about 2.0 pixels, and change the layer blend mode to "Overlay." This instantly pulls out the tiny micro-details (like pores in leather or grain in wood) and makes the texture look incredibly crisp and tactile.
Dealing with Common AI Texture Problems
AI isn't perfect. Sometimes it creates weird patterns or "ghost" shapes in your textures. When this happens, don't get frustrated. I usually just change one word in my prompt and try again.
If the texture looks too busy, try adding "simple" or "clean" to your prompt. If it looks too plain, add "complex details." It’s all about finding the right balance for your specific project.
I have found that the more I practice, the better I get at seeing these problems before they even happen. It is a skill that grows every time you use the tool. Just keep clicking and learning.
Real-Life Scenario: The Stone Wall Project
I once had a project where I needed a stone wall for a restaurant menu. I tried to use a stock photo, but it looked like a cheap wallpaper. I decided to generate a custom stone texture using AI.
I used a prompt that described "hand-cut mountain stones with grey mortar." The result was so good that the client asked if I had visited the mountains to take the photo. It was a proud moment for me.
This shows the power of having the right tools. I saved time, the client was happy, and the menu looked amazing. That is the true value of being able to create your own high-quality assets.
Understanding AI Model Variations
Different AI models create different styles. Some are better at "fantasy" looks, while others are great for photorealistic results. I always look for models that are specifically trained on real-life photos.
You can find these models on many open-source community sites. Each model has its own "personality." I have a few favorites that I always go to when I need something to look very real.
Trying out different models is part of the fun. You never know which one will give you that perfect texture for your next big design. It’s like having a hundred different cameras in your computer.
Why Science Matters in Texture Design
Even though we are using AI, we are still following the rules of science. Light, shadow, and surface roughness are all based on physics. The AI just helps us do the math faster.
Design is a mix of art and logic. Open-source AI brings those two things together in a beautiful way. It allows you to use the power of science to create something that is purely artistic.
Staying Creative in the Age of AI
Some people worry that AI will take away our creativity. I think the opposite is true. It removes the boring parts of the job so we can focus on being creative.
Instead of hunting for a texture for two hours, I can spend that time thinking about the layout or the color palette. AI is just a brush, and you are the painter. It still needs your eye and your heart to make something meaningful.
Don't let the technology scare you. Embrace it as a tool that helps you be the best version of yourself as a designer. The future of design is about humans and AI working together.
My Final Realization on Open-Source AI
When I started this journey, I was just looking for a way to save money. But I found something much better. I found a way to be more free and more creative than I ever thought possible.
Open-source AI has given me the keys to a kingdom of endless textures. I am no longer limited by what I can find on a stock site. I am only limited by my own imagination.
I hope you take this path too. It is a bit of a climb at first, but the view from the top is worth it. You will see your designs transform in ways that will amaze both you and your clients.
Preparing Your Workflow for Next-Gen Design
As we move forward, being able to use AI will be a standard skill. Just like knowing how to use layers or filters today. Learning it now gives you a huge advantage over those who wait.
Stock Textures vs. AI-Generated Textures: Which wins?
| Feature | Traditional Stock Sites | Open-Source AI (Stable Diffusion) |
| :--- | :--- | :--- |
| Cost | Usually $10 - $50 per high-res asset | 100% Free |
| Customization | You get what they have | You change the light, age, and cracks in seconds |
| Resolution | Fixed | Can be upscaled to 8k easily |
| Originality | Everyone uses the same files | Your texture is unique to your project |
Start small. Generate one texture today. See how it looks in your software. Then try another tomorrow. Before you know it, you will be a master of photorealistic textures.
Graphic design is always changing. The tools we use today are better than what we had five years ago. Open-source AI is just the next step in that long journey of making beautiful things.
Creating a Professional Texture Portfolio
One great way to show off your new skills is to build a texture portfolio. You can show the "before" and "after" of your projects. Explain how the AI-generated textures improved the final look.
This is a great way to attract new clients. They will see that you are an expert who stays on the cutting edge of technology. It shows that you care about quality and efficiency.
Your portfolio is your story. Make sure it tells a story of a designer who isn't afraid of the future. A designer who uses the best tools to create the most beautiful work.
Pro Methods for High-End AI Texture Control
If you want your work to look like it came from a top-tier studio, you need to master more than just text prompts. One of my favorite secrets is using something called ControlNet. It sounds technical, but it simply helps the AI follow a specific shape or depth you provide.
I often sketch a rough outline of a brick wall or a piece of cloth before I start the AI. By uploading this sketch into the tool, the AI knows exactly where to place the cracks and shadows. It stops the machine from guessing and puts you in the driver’s seat of the design process.
Another big tip is to work with "Normal Maps" and "Displacement Maps." These are special images that tell 3D software how light should bounce off a surface. You can use open-source AI to generate these maps along with your main texture.
This is a game-changer because it makes a flat image look like it has real 3D depth. I used this trick for a client project involving old leather, and the result was stunning. The light hit the "cracks" in the leather just like it would in the real world.
If you are worried about the privacy of your creative ideas while using these tools, I suggest reading about how free AI generators use your private prompts. Staying safe while being creative is a big part of being a professional. You should always know where your data is going.
To find the best pre-trained models for these advanced tasks, I often check out Hugging Face, which is the gold standard for open-source AI research. It helps me stay ahead of the curve without spending a cent. You can find models there that are specifically built for high-resolution textures.
I also like to mix different textures together to create something totally new. I might generate a rust texture and a scratched metal texture separately. Then, I blend them in my design software to get a more complex look.
This prevents your work from looking "AI-generic." It adds a human touch that shows you spent time thinking about the details. Clients notice these small things, and it helps you justify your professional rates.
Keeping your workspace clean is another secret to long-term success. I found that how cleaning your desk instantly reduces anxiety really changed my productivity. When my desk is clear, I can focus better on the tiny details of my AI textures.
The Traps That Can Ruin Your AI Design Journey
One of the biggest mistakes I see people make is over-relying on the AI to do all the work. They generate an image, download it, and think they are done. This often leads to "tiling errors" where you can see a visible seam when you try to repeat the texture.
It looks unprofessional and lazy. If you don't check for these seams, your 3D models will look like they are covered in cheap wallpaper. It can break the immersion of your design and make the client lose trust in your skills.
Another painful mistake is ignoring the real-world scale of materials. I once generated a beautiful stone texture but forgot to think about how big the stones should be. When I applied it to a building model, the stones looked like they were ten feet wide.
It looked ridiculous and ruined the whole scene. Always look at real photos of the material you are trying to copy. Notice the size of the grain in wood or the size of the pores in skin.
If you don't stay grounded in reality, your AI work will always look "off." People might not know why, but they will feel that something is wrong. This "uncanny valley" feel is the enemy of photorealistic design.
I also see many designers ignore their mental health during long projects. It’s easy to get lost in "late-night scrolling" for the perfect model. You should be aware of the hidden health risks of late-night scrolling to keep your energy high.
Taking breaks and moving your body is vital. I used to sit for ten hours straight and my neck would kill me. Learning to fix tech neck fast saved my career and helped me stay creative for longer periods.
Lastly, never ignore the copyright rules of the models you use. Even if a tool is open-source, the training data might have specific rules. Always check the license to make sure you can use the output for commercial work.
Falling into a legal trap is a quick way to end your career. Be smart, stay informed, and always read the fine print before you start a big project. It protects you and your clients from future headaches.
Putting Your New AI Skills into Action
You now have the knowledge to create textures that look real enough to touch. This isn't just about saving money on stock sites. It is about having the freedom to create anything you can imagine.
I want you to start small. Don't try to build a whole city today. Just pick one material—maybe a piece of old wood or a rusty metal sheet.
Try out different prompts and see how the AI reacts. Use the "tiling" trick I mentioned to make it seamless. Then, bring it into your favorite design tool and see how it looks under different lights.
The more you play with these tools, the more they will feel like a natural part of your hand. You are part of a new group of designers who are using AI to push the limits of art. It’s an exciting time to be a creator.
If you feel overwhelmed by the fast changes in tech, try using calm nervous system regulation techniques. They help me stay focused when the world feels like it is moving too fast. A calm mind is your best creative tool.
I truly believe that open-source AI is the future of professional graphic design. It levels the playing field so that anyone with a good eye can create world-class work. I am so excited to see what you create with these tools.
Just take that first step today. Open your AI tool, type your first detailed prompt, and see what happens. You might just surprise yourself with how good you actually are.
Quick Fixes for AI Texture Problems
Why does my AI texture look blurry when I zoom in?
This usually happens because the initial image size is too small. I recommend using a free AI upscaler to increase the resolution to 4k or 8k. It adds back the sharp details that make a surface look real.
Can I use these textures in commercial projects for clients?
Yes, if you use open-source models like Stable Diffusion, you usually own the output. However, always check the specific license of the "checkpoint" or model you are using. You can find legal details on sites like Civitai where most models are hosted.
How do I make the texture repeat without showing a line in the middle?
You need to use the "tiling" or "seamless" mode in your AI generator. Most open-source tools have a checkbox for this. If you miss this, you can also use the "Offset" filter in your design software to fix the edges manually.
Is my computer strong enough to run these AI tools?
You need a decent graphics card (GPU) to run these tools locally. If your computer is older, you can use cloud-based versions like Google Colab. For more tips on keeping your hardware safe, check out these smartphone charging myths which also apply to how we treat our tech.
What should I do if the AI keeps giving me weird colors?
Try adding "color-specific" words to your prompt, like "neutral grey" or "warm brown." You can also use "negative prompts" to tell the AI what you don't want, such as "blue tint" or "neon colors." This helps keep the material looking natural.
How do I learn more about professional 3D texture mapping?
I recommend visiting Blender.org for free tutorials on how to apply your AI textures to 3D models. It’s the best way to see your work come to life in a realistic scene. Learning the basics of 3D will make your AI textures ten times more useful.
Start Your Creative Journey Right Now
I spent so many hours failing so that you don't have to. The power to create professional, photorealistic textures is now sitting right in your computer. I want you to go out there and build something that makes people say "Wow, how did you do that?"
Disclaimer: The information in this post is for educational purposes only. AI technology changes quickly, so always verify the latest software updates and licensing rules. I am not responsible for any legal issues or hardware damage that may occur from using these tools.